October / November 2015
The air is getting colder, the leaves are changing colors, and frost is forming on the ground... Autumn is definitely here, and so are a few novel ideas to try out.
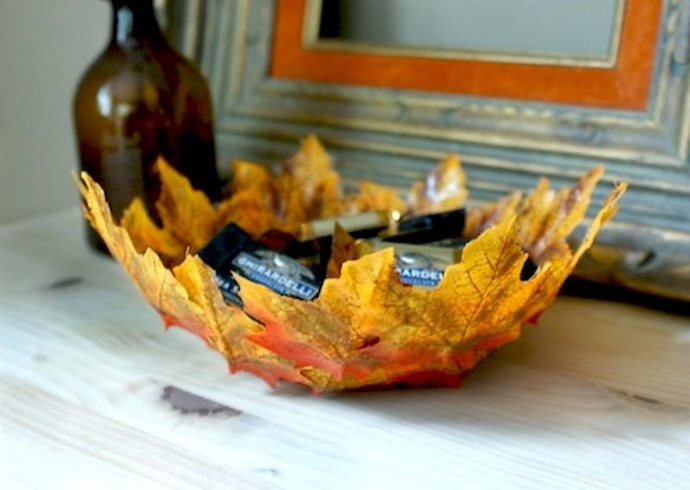
The few months at the end of the year are some of the best times to look outside of the window. The sharp contrast between trees and their foliage is stunning, and I almost always want to bring those fallen leaves inside. Leaf bowls are the perfect way of doing that.
You will need:
-
Either an autumn garland or some real leaves
-
Modge Podge (matte finish)
-
Foam brush
-
Balloon
-
Scissors
-
Bowl (optional)
-
Find an autumn garland. Try to choose one with thin leaves that are a good size (not too large and not too small). Also, avoid plastic-coated ones
-
-
Other options: Bundle up and step outside! While it might be cold, you’d be amazed at what you can find. Pick out some leaves - they should be pretty large. Press them dry by putting them into the pages of a large book.
-
-
Please note: while this may be a bit cheaper, real leaves often crumble or fall apart. Take extra care when using this method.
-
-
-
Begin by cutting the leaves off of the garland
-
-
(If using a garland) carefully rip off the entire plastic stem (including the “veins”) off of the faux leaves
-

-
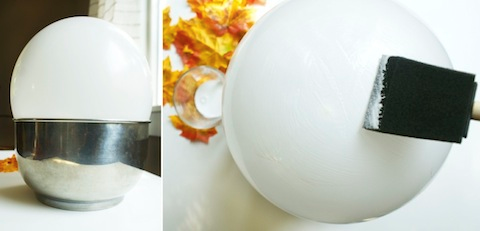
Inflate your balloon
-
-
Optional: place the balloon into a bowl to keep it in place
-
-
Apply a thin layer of Modge Podge to your balloon, starting at the center and working your way about halfway down
-
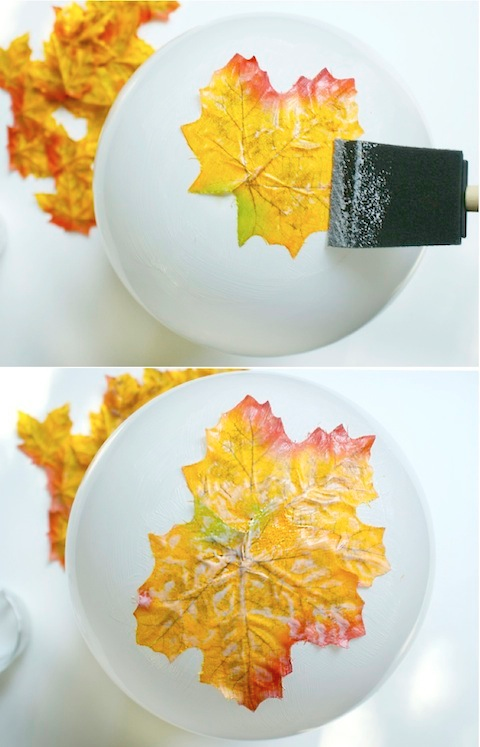
Gently place a leaf onto the top of your balloon. Smooth it out with your finger or the brush.
-
Repeat this by covering any empty spaces with leaves and Modge Podge.

-
When finished with this (it should be about halfway down), add a few extra leaves to the top of the balloon for more support
-
When the Modge Podge is dry, carefully pop the balloon with a pin (on the side without any leaves)
-
-
Don’t be alarmed if the leaves shrink when the balloon deflates - it will return to normal in a few minutes.
-
-
Gently peel the balloon out of the “leaf bowl”
-
You’re finished! Although you can’t actually eat out of this bowl, it’s a great decoration piece
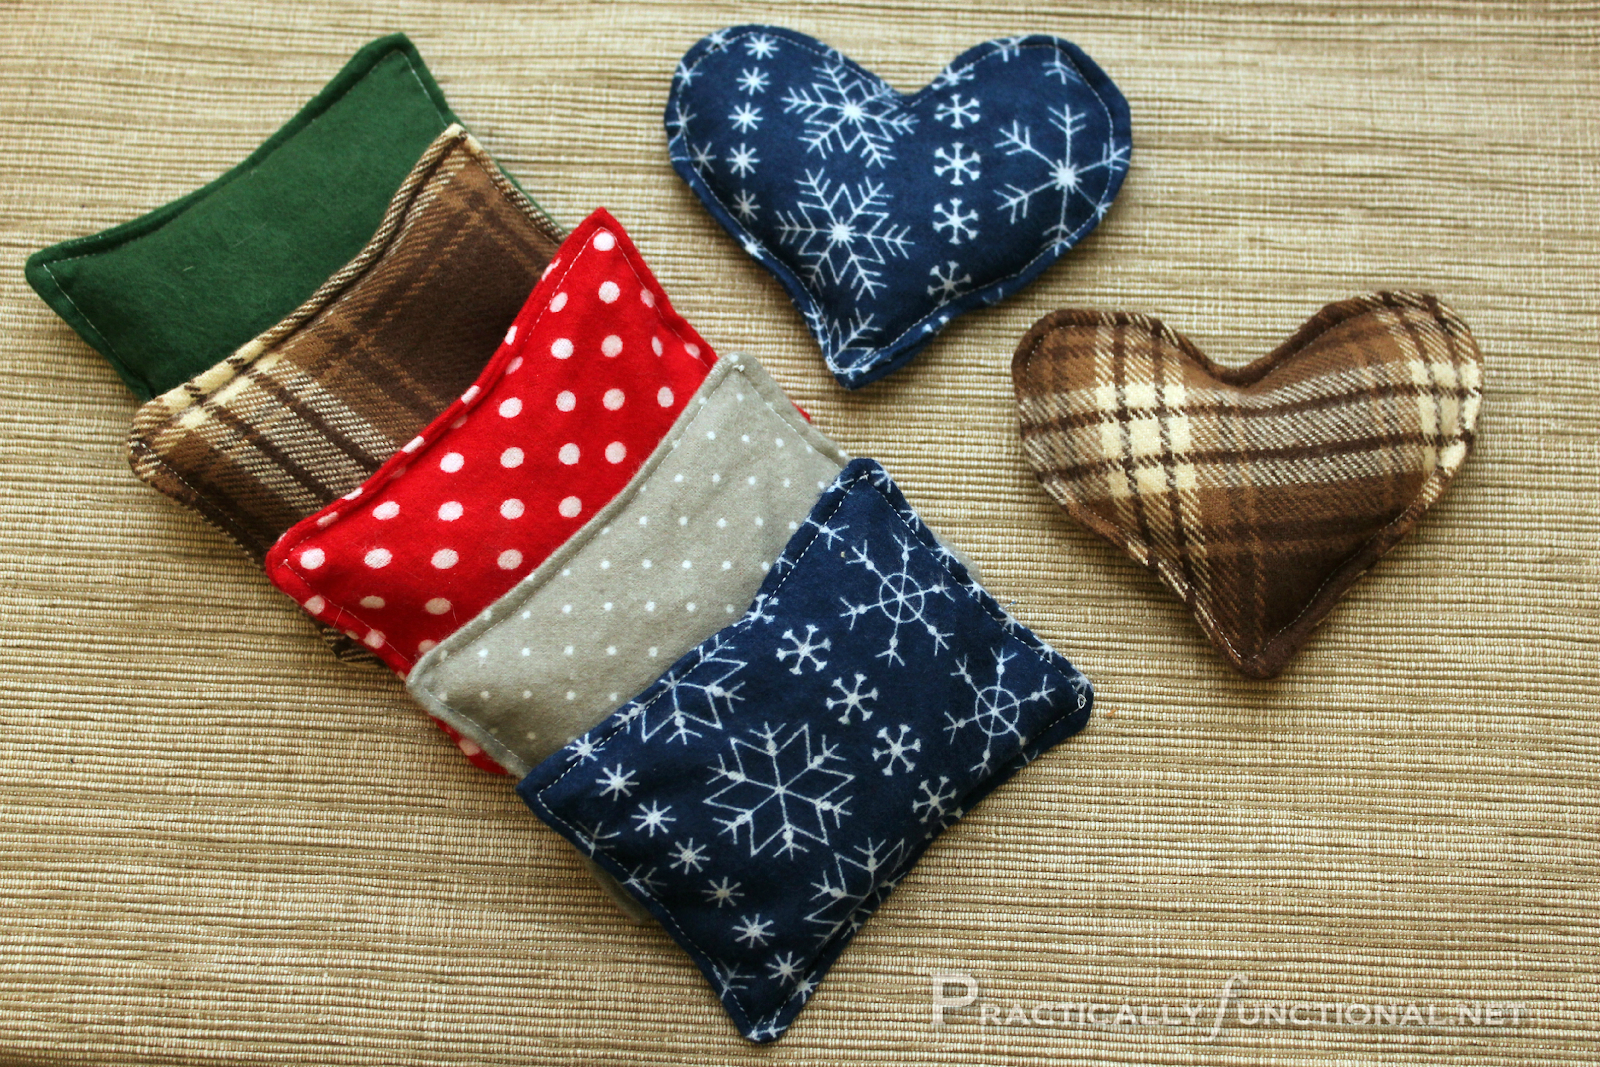
As the weather gets colder, my hands feel the chilly air the most. Gloves are wonderful, but hand warmers are a thousand times better... and while store-bought ones are cheap and easy to use, anybody can attest to a reusable homemade pair being a million times better, both in quality and in style.
You will need:
-
Flannel, fleece, or a cotton fabric (flannel and fleece are best)
-
-
Please note: DO NOT use felt
-
-
Rice or whole kernel corn (both work equally well, although whole kernel corn retains heat for longer)
-
-
Please note: whole kernel corn is not cracked corn or popping corn; you can find whole kernel corn at feed stores (it’s mainly used as chicken feed)
-
-
A needle and thread or a sewing machine
-
Scissors
-
Start by cutting out two identical pieces of fabric (flannel or fleece). You can do this by doubling the fabric, or by making a template. The pieces should be relatively small, so that they can fit in a hand or pocket.
-
-
Go crazy! Experiment with different shapes and ideas (stars, animals, etc.). Just remember that the simpler the shape, the easier it is to sew.
-
-
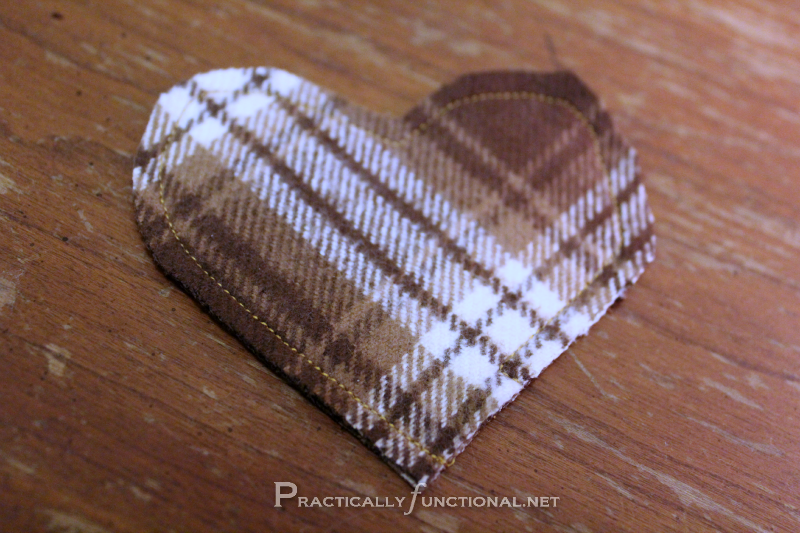
Sew the pieces together, leaving an opening (about 1/2 an inch to an inch) on one side. The opening in this picture is on the right side.
-
-
Optional: After you sew it, turn the fabric inside-out through the opening (that way, you can hide the stitches)
-
-
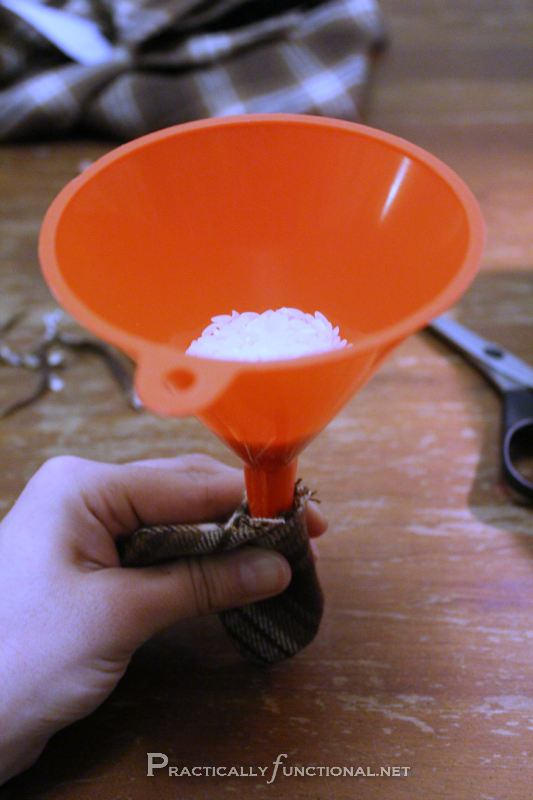
Pour the corn kernels or rice into the opening. Make sure that you fill up the hand-warmer, but not so much that you can’t move the rice/kernels around.
-
-
Tip: Use a funnel! If you don’t have one, roll a piece of paper so that one end is thin and one end is large (you can secure it with a piece of tape)
-
-
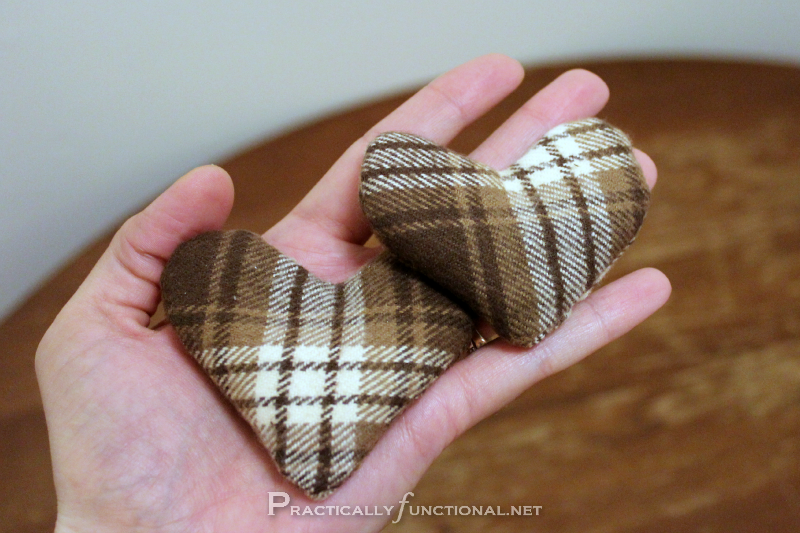
Sew the opening closed. If you turned it inside out, tuck the fabric in before sewing it shut.
-
You’re finished! When you want to use your new handwarmers, stick them into the microwave for 30-45 second on high heat
-
-
Warning: Please be cautious when doing this - don’t heat it so much that they burn your hands.
-
Although this season is perfect for staying outside and taking long walks amidst the foliage, one of my favorite parts of autumn is curling up inside and reading a book. Chairs are a perfect place to do this, but homemade chairs are even better. While this one may take a while, the result is better than you can imagine.
You will need:
-
One 1/4" x 3' oak dowel (oak is a hard wood and considered safer than poplar for supporting weight.
-
3/8" x 16' braided polypropylene (you can get this by the foot)
-
2 yards of plain canvas
-
80mm stainless steel spring snap link (holds up to 220 lbs)
-
3/16" stainless steel quick link (holds up to 660 lbs)
-
Fabric paint
-
Paintbrush
-
Drill and 3/8" drill bit
-
Sewing machine
-
Iron and ironing board
-
Shears
-
Ruler
-
Lighter (optional)

-
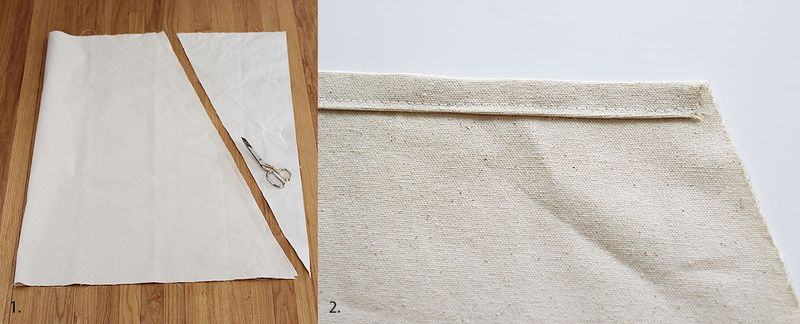
Fold your two yards of canvas in half and lay it flat with the fold on the left
-
Measure in about 7" from the top right edge and mark it with a pencil
-
Using a yardstick or ruler, draw a line from that top mark to the bottom right corner, and cut through both pieces. Open your canvas.
-
Fold the top edge down 1/2" and iron the crease flat
-
Fold it in again (1/2") and iron the crease flat
-
Stitch the bottom of the fold
-
Repeat the previous three steps with the long bottom edge.

-
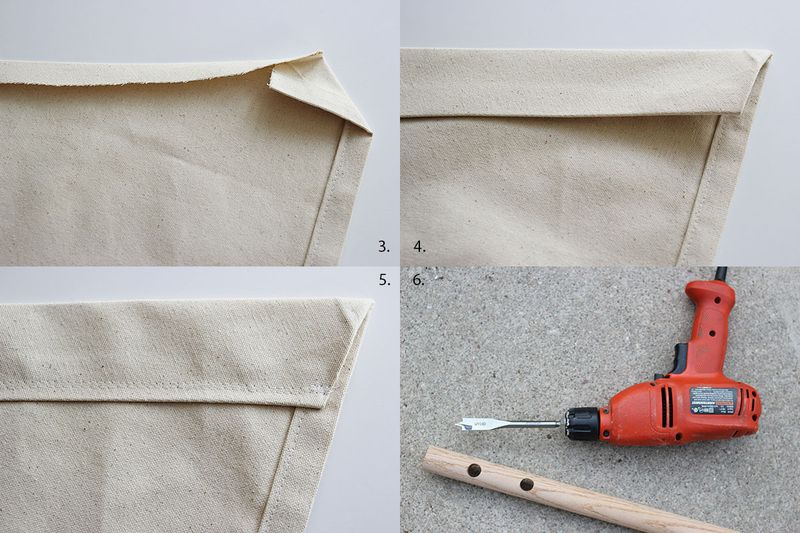
Flip your canvas 90 degrees to the left so that the longest edge is on the right. (You're going to be creating pockets for the rope to slide through on each side)
-
Fold each corner in about 1 1/2" and iron the crease flat.
-
Then, fold the unhemmed top edge in 1/2" and iron the crease flat.

-
Fold again 1 1/2" and iron flat.

-
Stitch two lines along the bottom folded edge (see picture below). Reinforce your beginning and ending with back stitches. Repeat with the other side.

-
Make a mark 2" and 4" in from both ends of your dowel
-
Drill through these
-
-
Optional: Sand your rough edges and stain if you'd like.
-
-
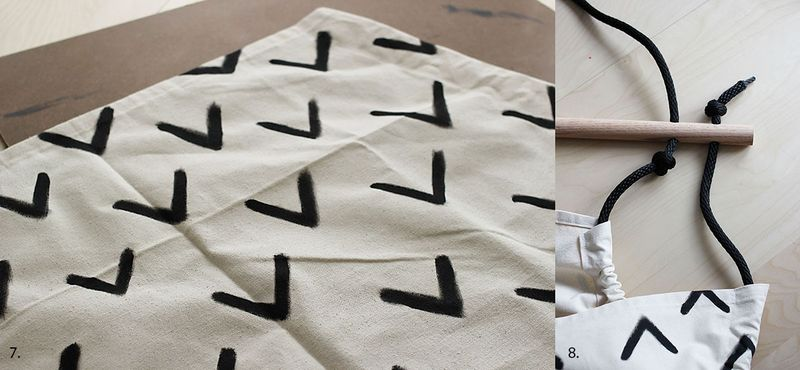
Place your canvas on a large sheet of cardboard and paint your design on one side. Let it dry
-
-
Optional: Paint a design on the other side of your fabric as well
-

-
Tie a knot at one end of your 16' rope so that there is about 3" of a tail.
-
-
Optional: Melt the end so it won't fray
-
-
If you do this, please be sure to use adult supervision.
-
-
-
Thread it down through the outer hole of your oak dowel and up from the widest corner of one side of your canvas seat to the narrow corner of the top
-
Tie a knot about 3' from your first knot, and thread it up into the oak dowel
-
Continue to thread it down into the hole 4" from the other edge. Measure 3' from the loose end, and tie a loose knot.
-
Thread it down through the other canvas pocket and back up through the last hole before tying a knot with a 3" tail. If your two sides aren't even, adjust your knots before pulling them tight.
-
Find the center of the rope above your dowel, and tie a knot with about 8"-10" of room above it. Attach your spring link, and then your quick link, and finally hang it on a hook screwed safely into a ceiling beam. Be sure to adjust all of your knots to make sure the seat sits evenly. Test it out by hanging on it before sitting in it to make sure everything is secure.

-
Please note:
-
-
The height of this chair can be adjusted based on the height of your ceiling.
-
You can add a small pillow to the seat to provide more cushion.
-
Other ideas:
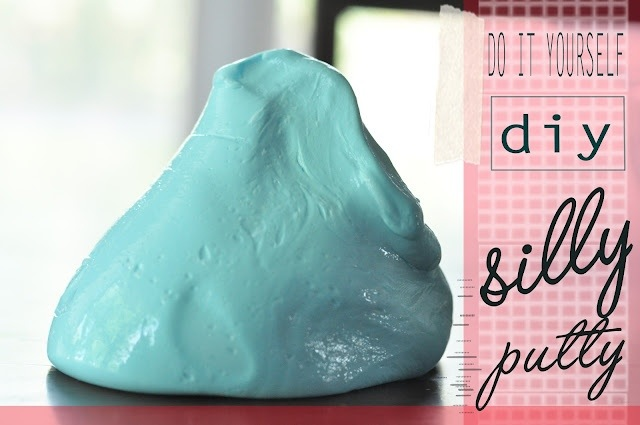
Make some silly putty! You will need:
-
Elmer’s glue (7.5 oz)
-
Liquid starch
-
Acrylic paint (whatever color you want your silly putty to be)
-
Bowl
-
Rubber spatula or spoon
-
Pour all your Elmer’s Glue into a clean bowl
-
Add a little bit of paint
-
Slowly add the liquid starch... the more you add, the stiffer the putty will be
-
Mix the ingredients with the spatula / spoon until you can take it out and knead it like dough. Add more starch to make it less sticky, and more glue to make it more sticky.
-
Enjoy!
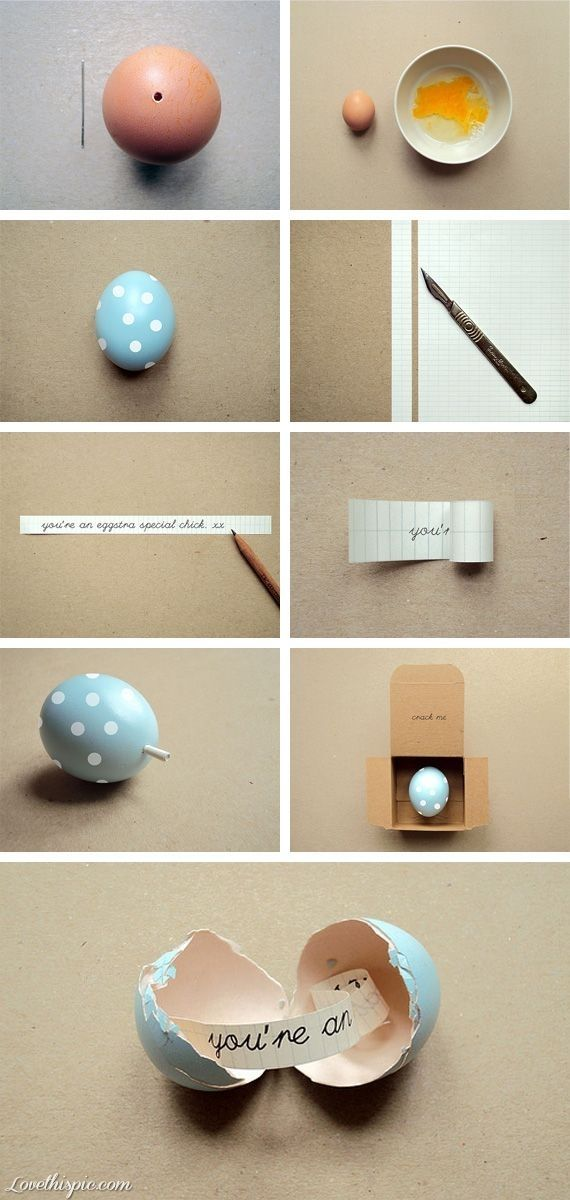
Make a fortune egg!
-
Pierce a small hole in the top of an egg
-
Push the end of a paper clip into the egg and move it around (so that you break the yolk). Pull the paper clip out and shake the egg gently, removing the egg-yolk and egg-white. Pour some water into the egg (through the hole) and shake it (gently) before pouring it back out. Let it dry (this will take a few hours)
-
-
If this does not work, here are some links to more suggestions:
-
-
Paint the egg (be careful not to break it!)
-
-
Note: It might be a bit easier to paint the egg before emptying it, but don’t make a mess!
-
-
Write a note on a small strip of paper and roll it up.
-
Push the paper into the egg through the hole in the top.
-
You’re all set!